Requesting a Known Customer Credential
Known Customer Credentials (KCCs) are Verifiable Credentials designed to streamline the Know Your Customer (KYC) process for tbDEX protocol users. KCCs help in gaining access to PFIs that provide regulated financial services.
For a comprehensive exploration of the practical applications and compliance considerations of KCCs, refer to the KCC Compliance Guide. It provides detailed examples and insights into how KCCs align with certain regulatory requirements. This offers valuable context for those overseeing the implementation and management of KCCs.
In this guide, we'll cover:
- Identity Verification (IDV): How your Wallet App initiates and supports the IDV process conformant with Self Issued OpenID Provider V2 (SIOPv2) and OpenID for Verifiable Presentations (OID4VP), ensuring users can securely verify their identity.
- Credential Request: The steps needed for your Wallet App to request a KCC on a user's behalf after successful IDV.
- Credential Management: How the Wallet utilizes existing credentials for KCC requests and securely stores the KCC itself.
For a detailed guide on Known Customer Credentials for Issuers, please refer to the Issuer's Known Customer Credential Guide
Environment Setup
Install Dependencies
Your Wallet App will require libraries for handling HTTP requests and processing JSON Web Tokens(JWTs). You can include these libraries in your project by installing the following dependencies:
npm install @web5/credentials@1.1.1
npm install @web5/dids@1.1.5
npm install @node-fetch
Framework Flexibility
The core logic provided in the code snippets of this guide is designed to be adaptable across different development environments. The code examples primarily cater to a Node.js environment however, the concepts shown can be applied within various frameworks or platforms, including web applications, server-side applications, and mobile applications. Depending on your development context, you'll need to adjust aspects like HTTP request handling, and secure storage to align with the practices and libraries of your chosen framework or platform.
IDV Process
Identity Verification is a critical component of typical KYC requirements, where certain types of Personally Identifiable Information (PII) are collected and verified from an individual. IDV is a crucial step before a KCC can be issued.
The IDV flow begins when your app, as the customer's agent, sends an HTTP request to the Issuer's IDV service endpoint specified in the Issuer's Decentralized Identifier (DID) Document.
1. Get IDV Endpoint
Resolve the Issuer's DID to get the IDV service Endpoint that can be found in the Issuer's DID Document:
2. Send HTTP request to Service Endpoint
Send an HTTP request to the IDV Service Endpoint:
The Issuer will then respond with a SIOPv2 Authorization Request in the JWT-Secured Authorization Request (JAR) format. This request contains information about the Issuer along with a Presentation Definition. Some of the key information included is:
client_id: Issuer's DID, establishing the Issuer/requestor's identity.response_type: Indicates the desired format (e.g.,id_token,vp_token) whereid_tokenis required andvp_tokenis optional. If the desired format specifiesvp_token, a verifiable presentation token should be provided to satisfy the presentation definition contained within the request.response_uri: Indicates the callback url for the Wallet, ensuring direct communication between the Wallet and the Issuer.nonce: A unique identifier tying together the request and its response.
Here's a JSON example where id_token and vp_token are both requested:
SIOPv2 Authorization Request
// Issuer.js

siopRequest = {
  client_id: issuerDidUri, // Issuer's Decentralized Identifier
  scope: 'openid', // Standard OpenID Connect scope
  response_type: 'id_token vp_token', // Expected response formats: ID Token and optionally, Verifiable Presentation Token
  response_uri: 'https://issuer.example.com/siopv2/response', // Endpoint for SIOP response delivery
  response_mode: 'direct_post', // Delivery method of the SIOP response
  nonce: 'n-0S6_WzA2Mj', // Unique string to link the request and response
  client_metadata: {
    // Descriptive metadata about the requesting party (Issuer)
    subject_syntax_types_supported: 'did:dht did:jwk',
    client_name: 'Issuance Service Name',
    client_uri: 'https://issuer.example.com',
    logo_uri: 'https://issuer.example.com/logo.png',
    tos_uri: 'https://issuer.example.com/tos',
    policy_uri: 'https://issuer.example.com/privacy',
  },
  presentation_definition: {
    id: 'IDCardCredentials',
    input_descriptors: [
      {
        id: 'IDCardCredential',
        schema: {
          uri: [
            'https://www.w3.org/2018/credentials#VerifiableCredential',
            'https://www.w3.org/2018/credentials/examples/v1#IDCardCredential',
          ],
          name: 'ID Card Credential',
          purpose: 'We need to verify your identity.',
        },
        constraints: {
          fields: [
            {
              path: ['$.vc.credentialSubject.given_name'],
              purpose: 'The given name on your ID card.',
            },
            {
              path: ['$.vc.credentialSubject.family_name'],
              purpose: 'The family name on your ID card.',
            },
            {
              path: ['$.vc.credentialSubject.birthdate'],
              purpose: 'Your birth date.',
            },
            {
              path: ['$.vc.credentialSubject.national_identifier'],
              purpose: 'Your national identifier.',
            },
          ],
        },
      },
    ],
  },
};
id_tokenis a self-issued Identity Token that authenticates the customer to the Issuer by sharing the customer's Decentralized Identifier.vp_tokenis a Verifiable Presentation that contains certified and authenticated claims about the customer.
In this guide, we'll cover an example vp_token and id_token.
To learn more refer to OpenID's specs on Issued Identity Token and Verifiable Presentation Token.
3. Create SIOPv2 Authorization Response
Decode the Issuer's SIOPv2 Authorization Request and create a SIOPv2 Authorization Response with id_token and vp_token:
If the User's Verifiable Credentials do not satisfy the Authorization Request's Presentation Definition then only the id_token will be sent to the Issuer's response_uri. If the credentials do satisfy then a Verifiable Presentation (vp_token) will also be sent.
If vp_token wasn't in the SIOPv2 Response, the Issuer will respond with a credential_offer and a url that points to a webpage (IDV form) for the customer to provide their Personally Identifiable Information. After successful completion of this form, the Wallet can proceed with the next steps, processing the Credential Offer.
IDV Form being filled out
Processing the Credential Offer
After successful completion of the Identity Verification - whether via form or the necessary VCs - your Wallet application will then begin processing the credential_offer from the Issuer. Here's an example of a credential_offer:
// Issuer.js

{
  "credential_issuer": "https://issuer.example.com",
  "credential_configuration_ids": [
    "knownCustomerCredential-basic",
    "knownCustomerCredential-extended"
  ],
  "grants": {
    "urn:ietf:params:oauth:grant-type:pre-authorized_code": "abc123xyz"
  }
}
The credential_offer object contains vital information about the Issuer:
credential_issuer: The base URL address of the Issuer's service. It is used by the Wallet to retrieve the Issuer's Metadata and the Issuer's Authorization Server Metadata.credential_configuration_ids: Unique strings that identify the credential you are offering. The Wallet can use these to request metadata.grants: Contains grant types the Issuer will accept for this credential offer.urn:ietf:params:oauth:grant-type:pre-authorized_code: Grant type required for the OpenID for Verifiable Credential Issuance (OID4VCI) Pre-Authorization flow.pre-authorized_code: The code representing the Credential Issuer's authorization for the Wallet to obtain an access token.
1. Extract Credential Offer
Extract and store the credential_issuer URL and pre_authorized_code from the credential offer:
The credential_issuer URL is crucial for the next steps, as it will be used to construct the URLs for fetching the Issuer's Metadata and the Issuer's Authorization Server Metadata.
2. Get Issuer's Metadata
Fetch the Issuer's Metadata from the credential_issuers URL
To construct the URL to fetch the Issuer's Metadata, the Wallet needs to append /.well-known/openid-credential-issuer to the credential_issuer URL provided in the credential_offer:
The Issuer's Metadata includes information about the Issuer's capabilities, credential endpoint, supported credential configurations, and more. Some of the key information included is:
credential_issuer: The base URL address of the Issuer's service. It is used by the Wallet to retrieve the Issuer's Metadata and the Issuer's Authorization Server Metadata.credential_endpoint: The endpoint the Wallet will use to submit requests to issue credentials. After obtaining an access token, the Wallet sends a credential request to this endpoint.credential_configurations_supported: Defines the formatjwt_vc_json, and the credential, including informative display markup.
Here is an example of an Issuer's Metadata:
Issuer's Metadata
// Issuer.js

{
  "credential_issuer": "https://issuer.example.com",
  "credential_endpoint": "https://issuer.example.com/credentials",
  "credential_configurations_supported": {
    "KnownCustomerCredential": {
      "format": "jwt_vc_json",
      "scope": "CustomerIdentity",
      "cryptographic_binding_methods_supported": ["did:example"],
      "credential_signing_alg_values_supported": ["EdDSA", "ES256K"],
      "credential_definition": {
        "type": ["VerifiableCredential", "KnownCustomerCredential"],
        "credentialSubject": {
          "country": {
            "display": [
              {
                "name": "Country",
                "locale": "en-US"
              }
            ]
          }
        }
      },
      "proof_types_supported": {
        "jwt": {
          "proof_signing_alg_values_supported": ["EdDSA", "ES256K"]
        }
      },
      "display": [
        {
          "name": "Known Customer Credential",
          "locale": "en-US",
          "logo": {
            "url": "https://issuer.example.com/public/logo.png",
            "alt_text": "Issuer Logo"
          },
          "background_color": "#FFFFFF",
          "text_color": "#000000"
        }
      ]
    }
  }
}
3. Get Authorization Server's Metadata
Fetch the Authorization Server's Metadata
Before the Wallet can request a KCC from the Issuer, the Wallet needs to also fetch the Issuer's Authorization Server Metadata by appending /.well-known/oauth-authorization-server to the credential_issuer URL in handleIssuerResponse():
The Server Authorization Metadata can look like this:
Server Authorization Metadata
// Issuer.js

{
   "issuer": "https://issuer.example.com", // URL of the Credential Issuer
   "token_endpoint": "https://issuer.example.com/token", // URL for the Access Token Request
};
issuer: The base URL of the Issuer's service.token_endpoint: The endpoint where the Wallet can exchange thepre_authorization_codereceieved in thecredential_offerfor an access token.
4. Get Access Token
Fetch the Access Token from the Issuer's /token endpoint:
If the IDV process is incomplete, the Issuer will return an authorization_pending error. In this case, the Wallet should wait for a short period before attempting another request to the Issuer's /token endpoint. This will allow time for the IDV process to be completed. The Wallet should continue these periodic attempts until an access_token is successfully received, indicating that the IDV process has concluded and authorization has been granted.
Here's an example Access Token Response from the Issuer:
Access Token Response
// Issuer.js

{
"access_token": "eyJhbGciOiJIUzI1NiIsInR5cCI6IkpXVCJ9.eyJzdWIiOiJkaWQ6ZXhhbXBsZTpPcTJ4T0J4NVVjIiwiaXNzIjoiZGlkOmV4YW1wbGU6SXNzdWVyRGlkIiwiaWF0IjoxNjE1MjM5MDIyLCJleHAiOjE2MTUzMjU0MjIsImNfbm9uY2UiOiJzYW1wbGVjbm9uY2UifQ.SflKxwRJSMeKKF2QT4fwpMeJf36POk6yJV_adQssw5c",
"token_type": "bearer",
"expires_in": 86400,
"c_nonce": "adQssw5c",
"c_nonce_expires_in": 86400
}
Request Known Customer Credential
After receiving the access_token from the Issuer, the Wallet can now send a KCC request to the credential_endpoint that was in the Issuer's Metadata.
Send Request to Issuer's Credential Endpoint
Sign and Send an HTTP POST request to the Issuer's credential endpoint:
To learn more about the fields within the payload and header, please refer to OpenID's specs.
The Known Customer Credential will be a signed VC JSON Web Token for secure transmission.
Example Known Customer Credential
To convert the signed VC JWT into a VerifiableCredential object you can use the parseJwt() method. Here is what a decoded Known Customer Credential would look like:
{
  "vcDataModel": {
    "@context": ["https://www.w3.org/2018/credentials/v1"],
    "type": ["VerifiableCredential"],
    "id": "urn:uuid:12345678-1234-5678-1234-567812345678",
    "issuer": "did:dht:z6Mkn4w6nSaWe4fjNJRvaHZwFnMm5VexvjzDeozEu2G7jC34",
    "issuanceDate": "2024-01-01T19:23:24Z",
    "expirationDate": "2026-05-19T08:02:04Z",
    "credentialSchema": {
      id: "https://vc.schemas.host/kcc.schema.json",
      type: "JsonSchema"
    },
    "evidence": [
      {
        kind: "document_verification",
        checks: ["passport", "utility_bill"]
      },
      {
        kind: "sanction_screening",
        checks: ["PEP"]
      }
    ],
    "credentialSubject": {
      "id": "did:dht:z6MkjGSeekPGE9QfczHWyW8v2ZzJU68kqSHzV7L2dmQyuyDu",
      "countryOfResidence": "US",
      "tier": "Gold",
      "jurisdiction": {
        "country": "US"
      }
    }
  }
}
To the user, an example KCC may look like this:
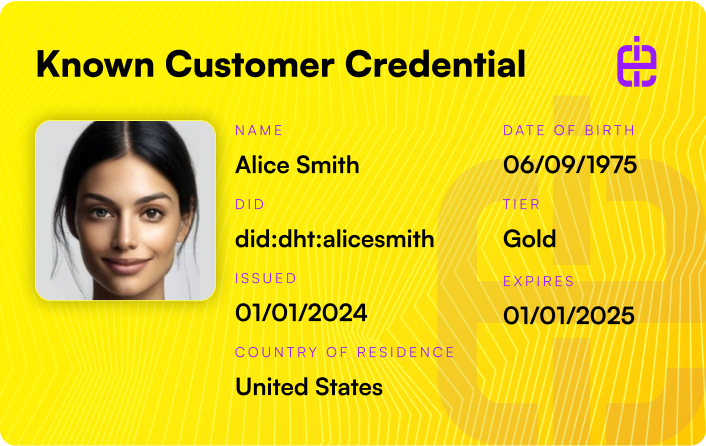
With that, you've successfully gone through the Identity Verification flow, requested a Known Customer Credential on behalf of the user, and securely stored the user's Known Customer Credential. Please note that this example is a foundational implementation. For a production environment, it's crucial to enhance this basic setup with comprehensive error handling, secure storage and security measures.
Next Steps
For an example of the complete flow for requesting and issuing a KCC, check out the Known Customer Credential Exemplar on GitHub. This exemplar provides a implementation of requesting and issuing a Known Customer Credential (KCC).
Was this page helpful?
Connect with us on Discord
Submit feedback: Open a GitHub issue
Edit this page: GitHub Repo
Contribute: Contributing Guide